系列文章目录
文章目录
- 系列文章目录
- 前言
- 🍇一、Love2d动画(Animation)
- 1️⃣.框架
- 2️⃣.四角型(Quads)
- 3️⃣.多行(Multiple rows)
- 4️⃣.出血的(Bleeding)
- 5️⃣.总结
- 🍋总结
前言

🍇一、Love2d动画(Animation)
1️⃣.框架
-
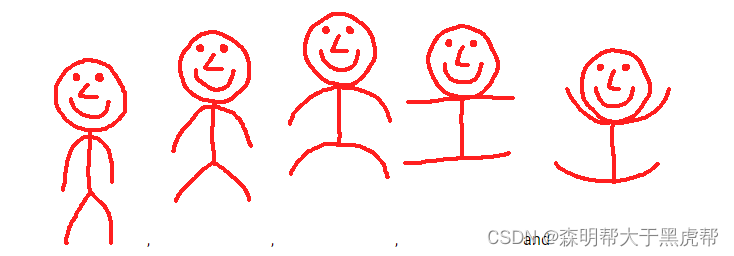
我们来做一个动画形象。
-
首先,你需要一些图片:
-
你也可以下载它们的压缩文件这里
-
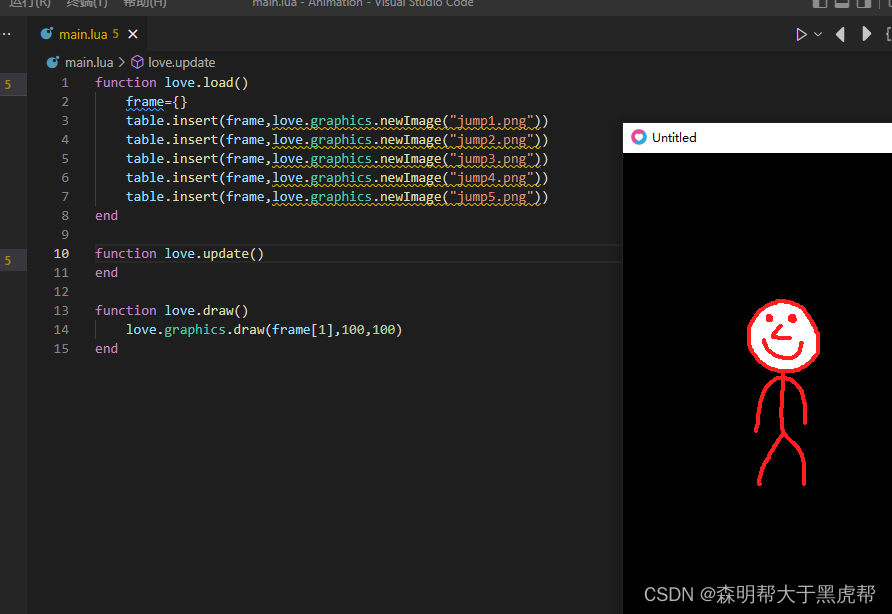
加载图像并将它们放入表格中。
function love.load()
    frame={}
    table.insert(frame,love.graphics.newImage("jump1.png"))
    table.insert(frame,love.graphics.newImage("jump2.png"))
    table.insert(frame,love.graphics.newImage("jump3.png"))
    table.insert(frame,love.graphics.newImage("jump4.png"))
    table.insert(frame,love.graphics.newImage("jump5.png"))
end

function love.update()
end

function love.draw()
    love.graphics.draw(frame[1],100,100)
end
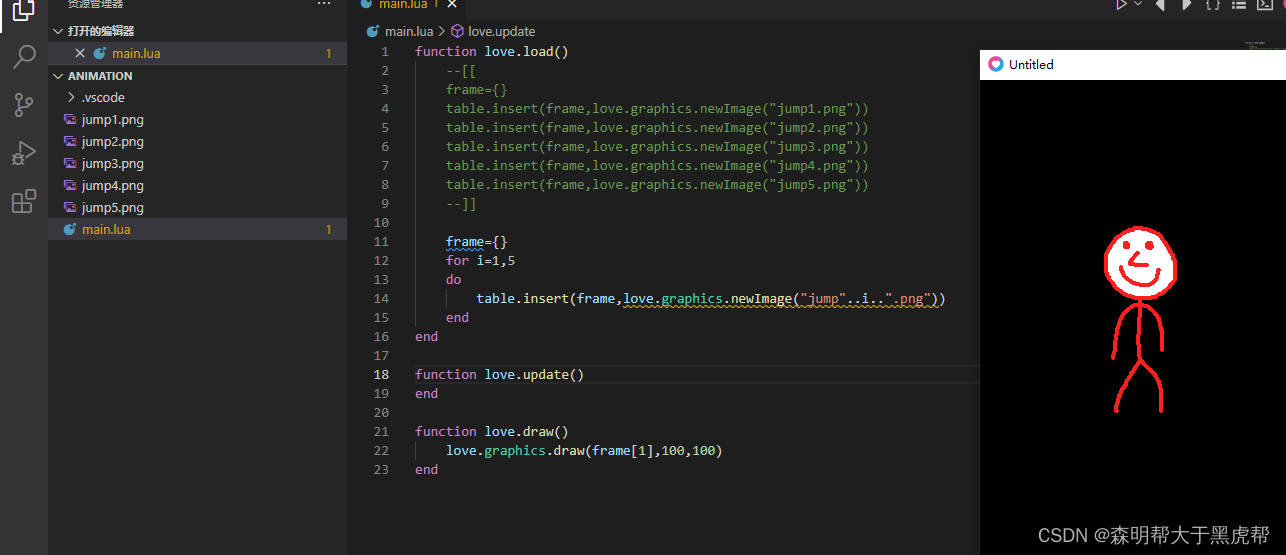
- 等等,我们可以做得更有效率。
function love.load()
    --[[
    frame={}
    table.insert(frame,love.graphics.newImage("jump1.png"))
    table.insert(frame,love.graphics.newImage("jump2.png"))
    table.insert(frame,love.graphics.newImage("jump3.png"))
    table.insert(frame,love.graphics.newImage("jump4.png"))
    table.insert(frame,love.graphics.newImage("jump5.png"))
    --]]

    frame={}
    for i=1,5
    do
        table.insert(frame,love.graphics.newImage("jump"..i..".png"))
    end
end

function love.update()
end

function love.draw()
    love.graphics.draw(frame[1],100,100)
end
- 那更好!现在我们需要创建一个动画。我们将如何做到这一点?
- 不。for循环可以让我们同时绘制所有的帧,但是我们希望每秒绘制不同的帧。我们需要一个每秒增加1的变量。这很简单!
- 现在我们有了变量currentFrame每秒增加1,让我们用这个变量来画帧。
function love.load()
    --[[
    frame={}
    table.insert(frame,love.graphics.newImage("jump1.png"))
    table.insert(frame,love.graphics.newImage("jump2.png"))
    table.insert(frame,love.graphics.newImage("jump3.png"))
    table.insert(frame,love.graphics.newImage("jump4.png"))
    table.insert(frame,love.graphics.newImage("jump5.png"))
    --]]

    frame={}
    for i=1,5
    do
        table.insert(frame,love.graphics.newImage("jump"..i..".png"))
    end

    --我使用了一个长名字,以避免与变量frame混淆
    currentFrame=1
end

function love.update(dt)
    currentFrame=currentFrame+dt
end

function love.draw()
    love.graphics.draw(frame[currentFrame],100,100)
end
- 如果你运行这个游戏,你会得到一个错误:“draw”的错误参数#1(应为Drawable,但为nil)

- 这是因为我们的变量currentFrame有小数。第一次更新后currentFrame类似于1.016,虽然我们的表在位置1和2上有一些东西,但在位置1.016上没有。可以把这个小数print出来看下。
function love.load()
    --[[
    frame={}
    table.insert(frame,love.graphics.newImage("jump1.png"))
    table.insert(frame,love.graphics.newImage("jump2.png"))
    table.insert(frame,love.graphics.newImage("jump3.png"))
    table.insert(frame,love.graphics.newImage("jump4.png"))
    table.insert(frame,love.graphics.newImage("jump5.png"))
    --]]

    frame={}
    for i=1,5
    do
        table.insert(frame,love.graphics.newImage("jump"..i..".png"))
    end

    --我使用了一个长名字,以避免与变量frame混淆
    currentFrame=1
end

function love.update(dt)
    currentFrame=currentFrame+dt
end

function love.draw()
    love.graphics.draw(frame[1],100,100)
    love.graphics.print(currentFrame,200,200)
end

- 为了解决这个问题,我们将数字向下舍入为math.floor。所以1.016会变成1。
function love.load()
    --[[
    frame={}
    table.insert(frame,love.graphics.newImage("jump1.png"))
    table.insert(frame,love.graphics.newImage("jump2.png"))
    table.insert(frame,love.graphics.newImage("jump3.png"))
    table.insert(frame,love.graphics.newImage("jump4.png"))
    table.insert(frame,love.graphics.newImage("jump5.png"))
    --]]

    frame={}
    for i=1,5
    do
        table.insert(frame,love.graphics.newImage("jump"..i..".png"))
    end

    --我使用了一个长名字,以避免与变量frame混淆
    currentFrame=1
end

function love.update(dt)
    currentFrame=currentFrame+dt
end

function love.draw()
    love.graphics.draw(frame[math.floor(currentFrame)],100,100)
    love.graphics.print(currentFrame,200,200)
end

- 运行游戏,你会看到我们的动画工作,但你最终会得到一个错误。这是因为currentFrame变得高于(或等于)6。而我们只有5帧。为了解决这个问题,我们重置currentFrame如果它高于(或等于)6。当我们在做的时候,让我们加速我们的动画。
function love.load()
    --[[
    frame={}
    table.insert(frame,love.graphics.newImage("jump1.png"))
    table.insert(frame,love.graphics.newImage("jump2.png"))
    table.insert(frame,love.graphics.newImage("jump3.png"))
    table.insert(frame,love.graphics.newImage("jump4.png"))
    table.insert(frame,love.graphics.newImage("jump5.png"))
    --]]

    frame={}
    for i=1,5
    do
        table.insert(frame,love.graphics.newImage("jump"..i..".png"))
    end

    --我使用了一个长名字,以避免与变量frame混淆
    currentFrame=1
end

function love.update(dt)
    currentFrame=currentFrame+10*dt
    if currentFrame>=6
    then
        currentFrame=1
    end
end

function love.draw()
    love.graphics.draw(frame[math.floor(currentFrame)],100,100)
    love.graphics.print(currentFrame,200,200)
end
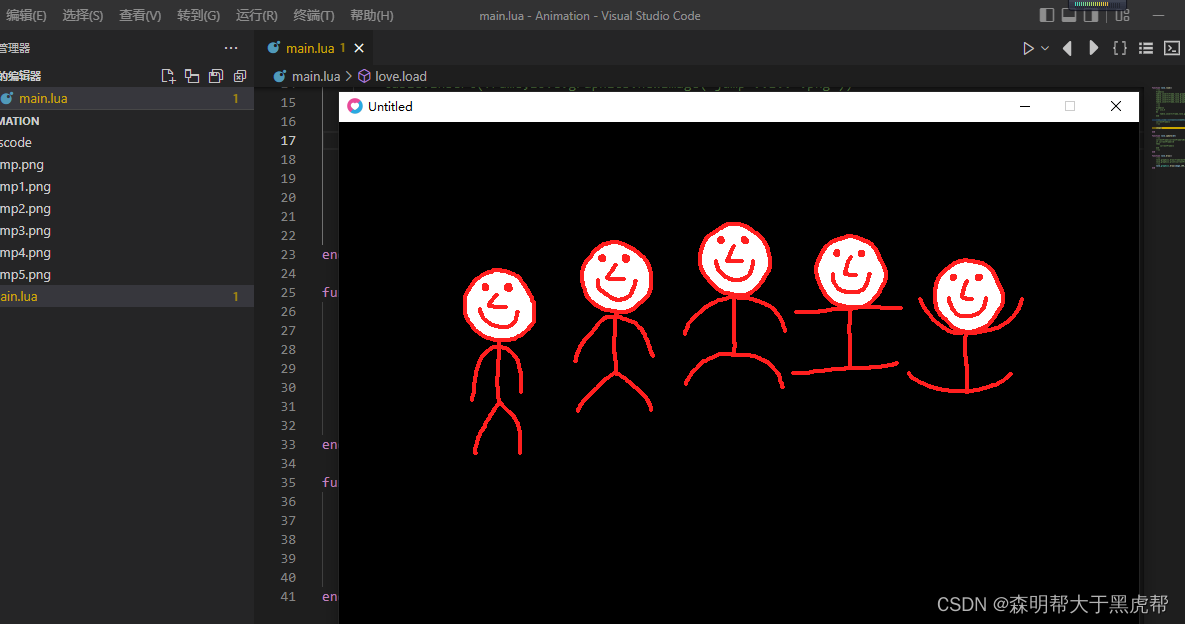
- 看他走了!

2️⃣.四角型(Quads)
- 这是可行的,但效率不是很高。对于大型动画,我们需要大量的图像。如果我们把所有的帧放入一个图像中,然后画出图像的一部分会怎么样。我们可以用四头肌来做。
- 首先,下载这张图片:

- 我们将重新设计功能love. load(你可以保留love.update和love.draw就是这么回事)。
function  love.load()
    image=love.graphics.newImage("jump.png")
end

function love.update(dt)
end

function  love.draw()
    love.graphics.draw(image,100,100)
end
-
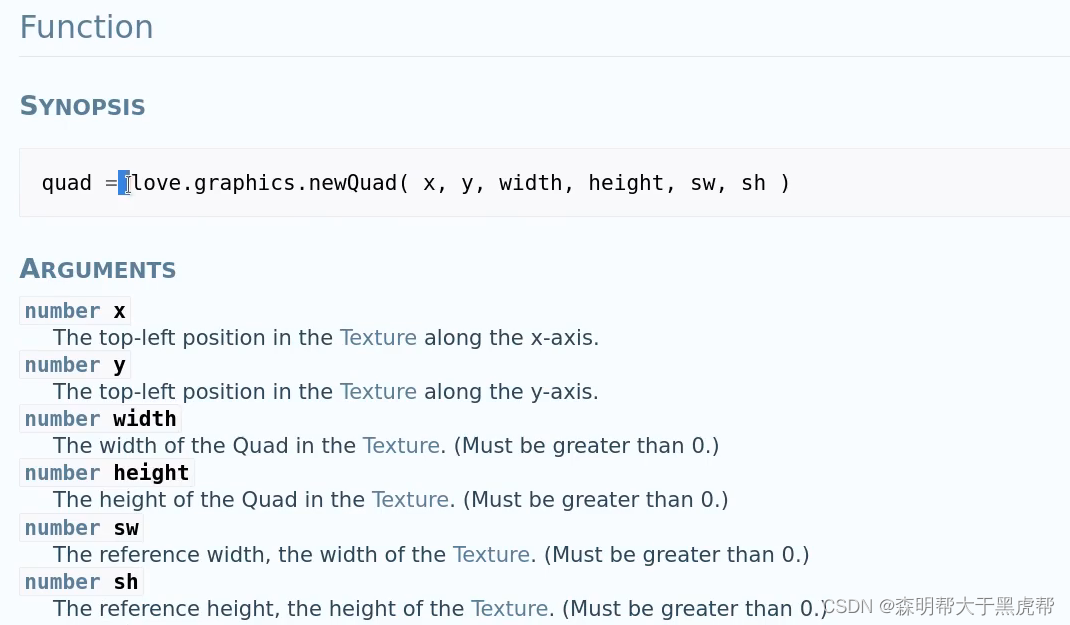
想象四边形就像一个我们从图像中切掉的矩形。我们告诉游戏“我们想要这部分图像”。我们将制作第一帧的四边形。你可以用love.graphics.newQuad (维基)。
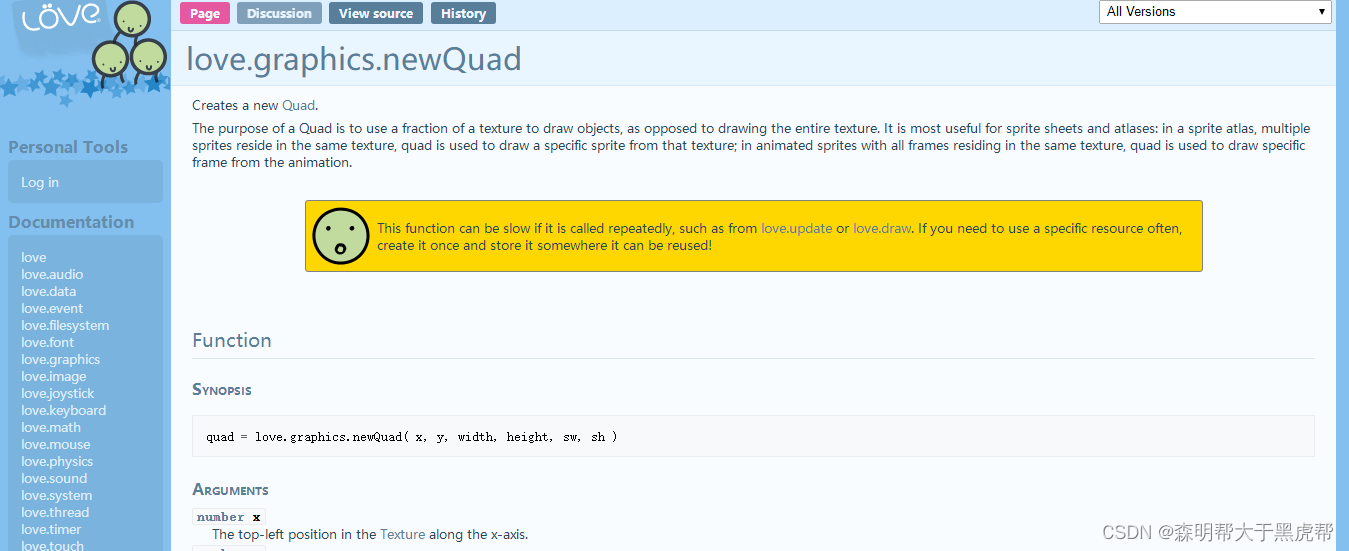
-
第一个参数是四边形的x和y位置。因为我们想要第一帧,我们取图像的左上角,所以0,0。
-
再说一遍,四边形就像切一张纸。我们最终将在哪里绘制图像与四边形无关。
-
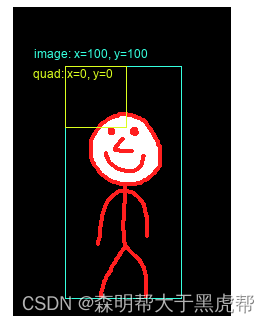
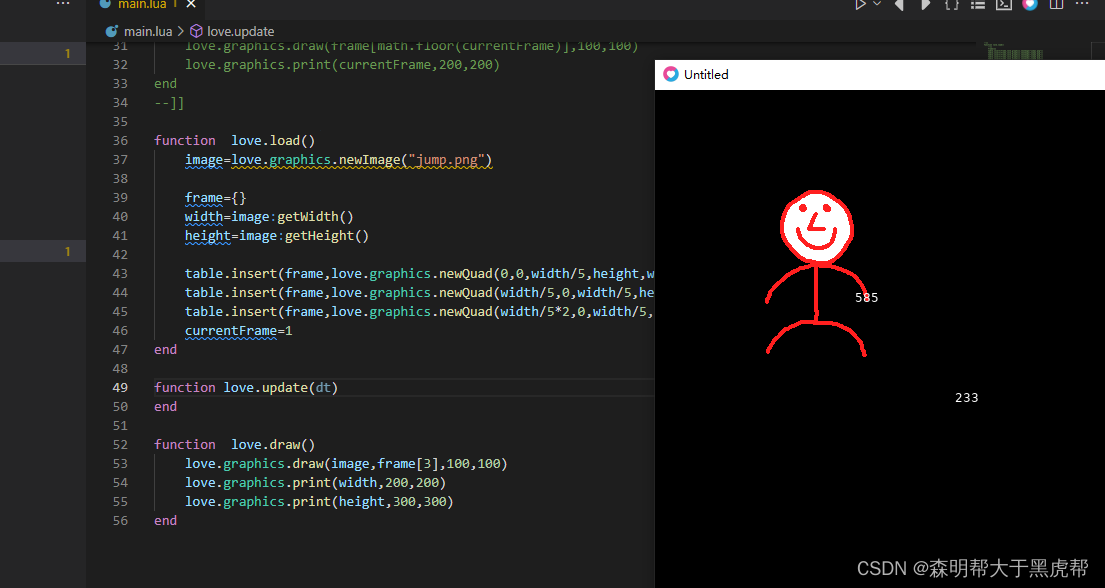
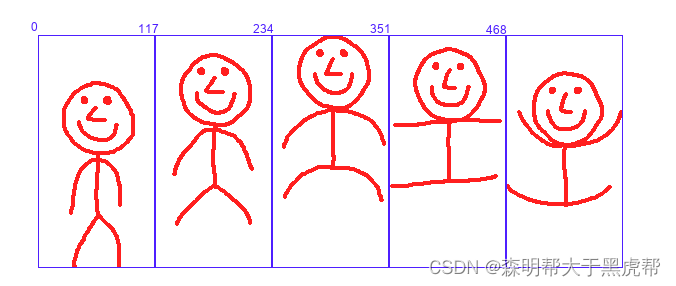
接下来的两个参数是四边形的宽度和高度。在我们的图像中,一帧的宽度是117,高度是233。最后两个参数是完整图像的宽度和高度。我们可以得到这些image:getWidth()和image:getHeight()。
function  love.load()
    image=love.graphics.newImage("jump.png")

    frame={}
    width=image:getWidth()
    height=image:getHeight()

    table.insert(frame,love.graphics.newQuad(0,0,width/5,height,width,height))
    currentFrame=1
end

function love.update(dt)
end

function  love.draw()
    love.graphics.draw(image,100,100)
    love.graphics.print(width,200,200)
    love.graphics.print(height,300,300)
end
- 在让我们通过绘制来测试我们的四边形。通过将它作为第二个参数传入love.graphics.draw.。
function  love.load()
    image=love.graphics.newImage("jump.png")

    frame={}
    width=image:getWidth()
    height=image:getHeight()

    table.insert(frame,love.graphics.newQuad(0,0,width/5,height,width,height))
    currentFrame=1
end

function love.update(dt)
end

function  love.draw()
    love.graphics.draw(image,frame[1],100,100)
    love.graphics.print(width,200,200)
    love.graphics.print(height,300,300)
end
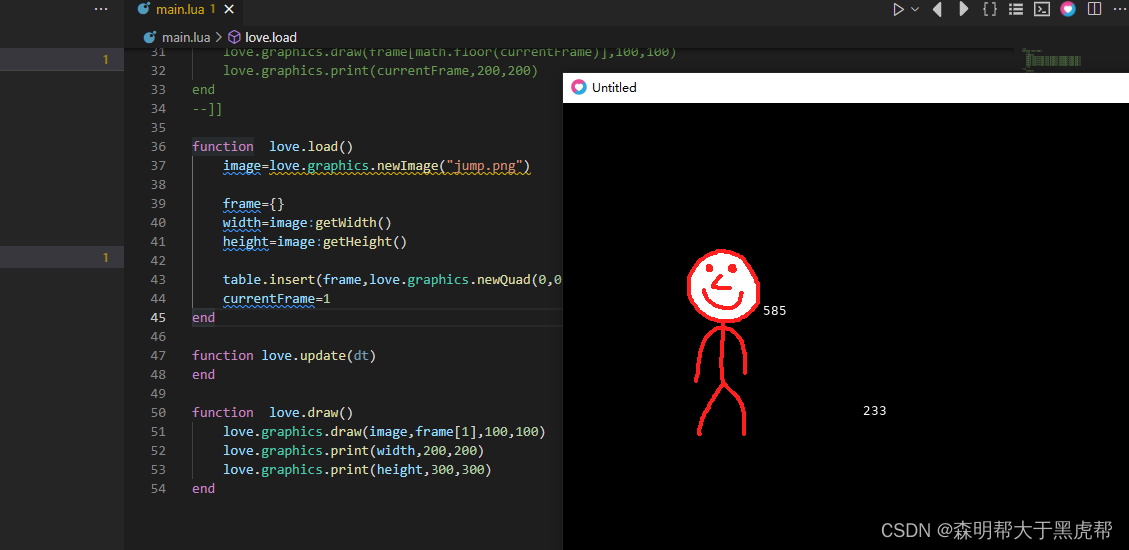
- 如你所见,它正在绘制我们的第一帧。很好,现在让我们做第二个四边形。
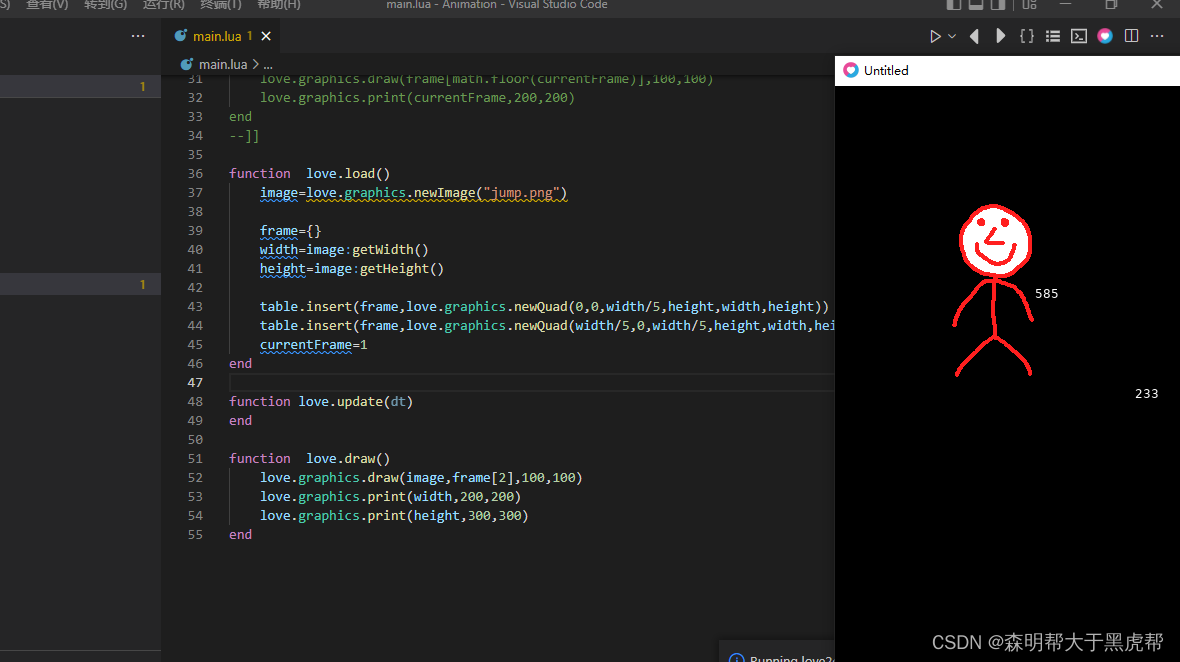
- 要绘制第二个框架,我们需要做的就是将矩形向右移动。因为每一帧的宽度是117,我们需要做的就是把x向右移动117。
--[[
function love.load()
    --[[
    frame={}
    table.insert(frame,love.graphics.newImage("jump1.png"))
    table.insert(frame,love.graphics.newImage("jump2.png"))
    table.insert(frame,love.graphics.newImage("jump3.png"))
    table.insert(frame,love.graphics.newImage("jump4.png"))
    table.insert(frame,love.graphics.newImage("jump5.png"))
    --]]
--[[
    frame={}
    for i=1,5
    do
        table.insert(frame,love.graphics.newImage("jump"..i..".png"))
    end

    --我使用了一个长名字,以避免与变量frame混淆
    currentFrame=1
end

function love.update(dt)
    currentFrame=currentFrame+10*dt
    if currentFrame>=6
    then
        currentFrame=1
    end
end

function love.draw()
    love.graphics.draw(frame[math.floor(currentFrame)],100,100)
    love.graphics.print(currentFrame,200,200)
end
--]]

function  love.load()
    image=love.graphics.newImage("jump.png")

    frame={}
    width=image:getWidth()
    height=image:getHeight()

    table.insert(frame,love.graphics.newQuad(0,0,width/5,height,width,height))
    table.insert(frame,love.graphics.newQuad(width/5,0,width/5,height,width,height))
    currentFrame=1
end

function love.update(dt)
end

function  love.draw()
    love.graphics.draw(image,frame[2],100,100)
    love.graphics.print(width,200,200)
    love.graphics.print(height,300,300)
end
- 我们可以对第三个四边形做同样的事情。
function  love.load()
    image=love.graphics.newImage("jump.png")

    frame={}
    width=image:getWidth()
    height=image:getHeight()

    table.insert(frame,love.graphics.newQuad(0,0,width/5,height,width,height))
    table.insert(frame,love.graphics.newQuad(width/5,0,width/5,height,width,height))
    table.insert(frame,love.graphics.newQuad(width/5*2,0,width/5,height,width,height))
    currentFrame=1
end

function love.update(dt)
end

function  love.draw()
    love.graphics.draw(image,frame[3],100,100)
    love.graphics.print(width,200,200)
    love.graphics.print(height,300,300)
end
- 等等,我们在重复同样的动作吗?我们没有什么可以治的吗?
- for循环!此外,我们可以通过将值存储在变量中来防止多次调用image:getWidth()和image:getHeight()。
- 请注意,我们是如何从0开始 for循环,并在4结束,而不是从1到5。这是因为我们的第一个四边形在位置0,0 * 177等于0。
- 现在剩下要做的就是使用currentFrame来绘制我们想要的四边形。
function  love.load()
    image=love.graphics.newImage("jump.png")

    frame={}
    width=image:getWidth()
    height=image:getHeight()

    --[[
    table.insert(frame,love.graphics.newQuad(0,0,width/5,height,width,height))
    table.insert(frame,love.graphics.newQuad(width/5,0,width/5,height,width,height))
    table.insert(frame,love.graphics.newQuad(width/5*2,0,width/5,height,width,height))
    --]]

    for i=0,4
    do
        table.insert(frame,love.graphics.newQuad(i*width/5,0,width/5,height,width,height))
    end
    currentFrame=1
end

function love.update(dt)
    currentFrame=currentFrame+10*dt
    if currentFrame>=6
    then
        currentFrame=1
    end
end

function  love.draw()
    love.graphics.draw(image,frame[math.floor(currentFrame)],100,100)
    love.graphics.print(width,200,200)
    love.graphics.print(height,300,300)
end

3️⃣.多行(Multiple rows)
- 所以我们现在可以把一行帧变成一个动画,但是如果我们有多行呢?
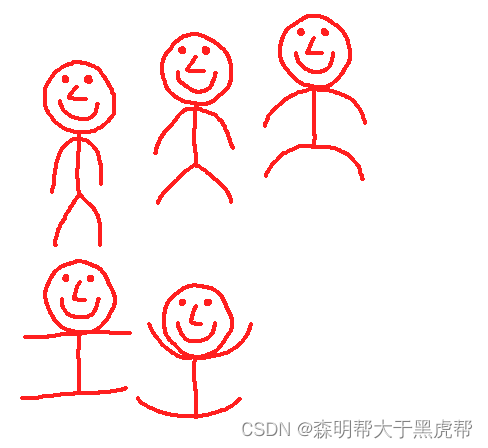
- 简单,我们只需要用不同的y值重复同样的事情。
function love.load()
    image = love.graphics.newImage("jump_2.png")
    local width = image:getWidth()
    local height = image:getHeight()

    frame = {}

    local frame_width = 117
    local frame_height = 233

    for i=0,2 do
        table.insert(frame, love.graphics.newQuad(i * frame_width, 0, frame_width, frame_height, width, height))
    end

    for i=0,1 do
        table.insert(frame, love.graphics.newQuad(i * frame_width, frame_height, frame_width, frame_height, width, height))
    end

    --[[
    for i=0,1 do
        --I changed i to j in the inner for-loop
        for j=0,2 do
            --Meaning you also need to change it here
            table.insert(frame, love.graphics.newQuad(j * frame_width, i * frame_height, frame_width, frame_height, width, height))
        end
    end
    --]]

    currentFrame = 1
end

function love.update(dt)
    currentFrame=currentFrame+10*dt
    -- if currentFrame>=6
    -- then
    --     currentFrame=1
    -- end
end

function love.draw()
    love.graphics.draw(image,frame[math.floor(currentFrame)],100,100)
end

- 但是等等,又来了:重复!当我们看到重复时我们会怎么做?我们使用for循环。
- 那么什么是for循环中的for循环呢?
- 没错。不过,我们还是要做一些改变。
function love.load()
    image = love.graphics.newImage("jump_2.png")
    local width = image:getWidth()
    local height = image:getHeight()

    frame = {}

    local frame_width = 117
    local frame_height = 233

    --[[
    for i=0,2 do
        table.insert(frame, love.graphics.newQuad(i * frame_width, 0, frame_width, frame_height, width, height))
    end

    for i=0,1 do
        table.insert(frame, love.graphics.newQuad(i * frame_width, frame_height, frame_width, frame_height, width, height))
    end
    --]]

    for i=0,1 do
        --I changed i to j in the inner for-loop
        for j=0,2 do
            --Meaning you also need to change it here
            table.insert(frame, love.graphics.newQuad(j * frame_width, i * frame_height, frame_width, frame_height, width, height))
        end
    end


    currentFrame = 1
end

function love.update(dt)
    currentFrame=currentFrame+10*dt
    -- if currentFrame>=6
    -- then
    --     currentFrame=1
    -- end
end

function love.draw()
    love.graphics.draw(image,frame[math.floor(currentFrame)],100,100)
end

- 所以在外部for循环的第一次迭代中,i等于0,j等于0,然后是1,然后是2,最后是3。在第二次迭代中,i等于1,j再次等于0,然后1,然后2,最后3。
- 你可能会注意到最后会出现上面一样的错误。这没什么大不了的,因为我们只有画了前5个四边形,但是我们可以像这样做来防止它:
function love.load()
    image = love.graphics.newImage("jump_2.png")
    local width = image:getWidth()
    local height = image:getHeight()

    frame = {}

    local frame_width = 117
    local frame_height = 233

    --[[
    for i=0,2 do
        table.insert(frame, love.graphics.newQuad(i * frame_width, 0, frame_width, frame_height, width, height))
    end

    for i=0,1 do
        table.insert(frame, love.graphics.newQuad(i * frame_width, frame_height, frame_width, frame_height, width, height))
    end
    --]]

    for i=0,1 do
        --I changed i to j in the inner for-loop
        for j=0,2 do
            --Meaning you also need to change it here
            table.insert(frame, love.graphics.newQuad(j * frame_width, i * frame_height, frame_width, frame_height, width, height))
        end
    end


    currentFrame = 1
end

function love.update(dt)
    currentFrame=currentFrame+10*dt
    if currentFrame>=6
    then
        currentFrame=1
    end
end

function love.draw()
    love.graphics.draw(image,frame[math.floor(currentFrame)],100,100)
end

4️⃣.出血的(Bleeding)
- 使用四边形旋转和/或缩放图像时,会出现一种称为出血的。发生的情况是四边形之外的图像部分被绘制。
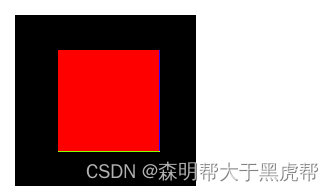
- 所以如果这是我们的精神世界:

- 我们的第一帧可能会这样结束:
- 这是一种技术上的原因,但事实是它确实发生了。幸运的是,我们可以通过在边框周围添加一个1像素的边框来解决这个问题。或者与实际边框颜色相同,或者具有透明度。
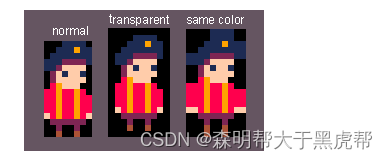
- 然后我们不包括四边形内的边界。
- 我给我们跳跃的角色添加了一个边框。我把它变成了紫色,而不是透明的,这样我们就可以看到我们是否不小心画出了部分边框。
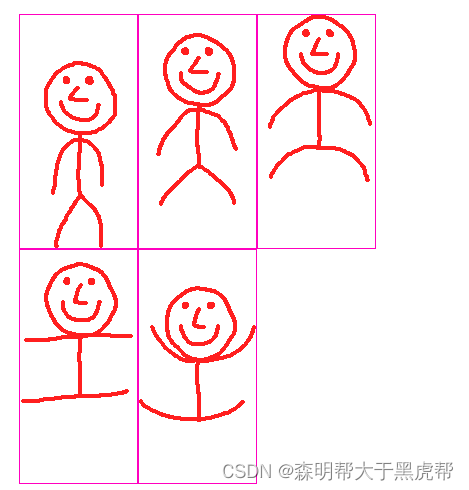
- 让我们一步一步来。
- 首先,我们不希望绘制第一个像素,所以我们的四边形从1(而不是0)开始。
newQuad(1, 1, frame_width, frame_height, width, height)
- 好的,这适用于第一帧,但是我们要画下一帧的哪一部分呢?只需添加框架宽度/高度?
newQuad(1 + j * frame_width, 1 + i * frame_height, frame_width, frame_height, width, height)
- 差不多了。我们遗漏了一些东西。
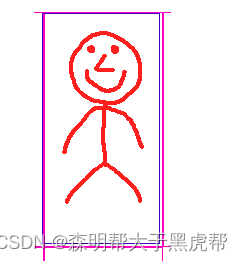
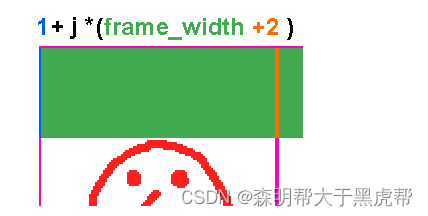
- 蓝线是我们的四边形。正如你所看到的,四边形在它应该在的地方的左边2个像素。所以让我们在每次迭代的移动量上加2。
newQuad(1 + j * (frame_width + 2), 1 + i * (frame_height + 2), frame_width, frame_height, width, height)
- 现在我们的四头肌在正确的位置。这是一张我们如何定位四轴飞行器的图像。所以我们加1,然后加框架_宽度+ 2,乘以我。这样,我们可以为每一帧正确定位四边形。
5️⃣.总结
- 使用四边形,我们可以绘制图像的一部分。我们可以用它将spritesheet变成动画。在多行的情况下,我们可以在for循环中使用for循环来覆盖整个工作表。我们可以使用break结束循环。我们给精灵添加了一个1像素的边框来防止bleeding的。
🍋总结
以上就是今天要讲的内容,本文仅仅简单介绍了Love2d动画(Animation)的使用,与博主的lua语言文章结合更好的理解love2d的编码,如果你是一名独立游戏开发者,或者一位对游戏开发有着深厚兴趣,但是又对于unity3d,ue4等这些对于新手而言不太友好的引擎而头疼的开发者;那么现在,你可以试试Love2D。Love2D是一款基于Lua编写的轻量级游戏框架,尽管官方称呼其为引擎,但实际上它只能称得上是一个框架,因为他并没有一套全面完整的解决方案。不过,这款框架上手及其容易,是学习游戏开发的初学者入门的一个良好选择。